Create Interactive Lessons With Voice and Visuals No Studio Needed

In the world of digital education, engaging students with interactive lessons has become more important than ever. Whether you're a teacher, trainer, or content creator, delivering lessons that combine visuals and voice is a powerful way to keep learners interested. But the best part? You don’t need a fancy studio setup to make it happen. Thanks to free or affordable tools, you can create professional, interactive lessons from the comfort of your home. In this blog post, we will explore how you can create interactive lessons with voice and visuals using simple tools and step-by-step guidance.
One key element of creating engaging lessons is adding text to speech technology. This feature allows you to turn written content into spoken words, making your lessons more dynamic and easier to follow. Whether you're teaching a lesson, narrating a story, or explaining concepts, text to speech can make your content come alive.
Why Use Voice and Visuals in Lessons?
Voice and visuals are two powerful tools in creating effective and interactive lessons. Visuals help break up text-heavy slides or documents, making the learning process more enjoyable. They can include anything from images and diagrams to animations and charts. Studies have shown that people retain information better when it’s accompanied by visual aids. When learners can see and hear information simultaneously, it improves their understanding and retention.
Adding text to speech to your lessons can also improve accessibility. For students with learning disabilities, such as dyslexia, hearing content can make a huge difference. It allows them to process the information more effectively. Furthermore, it engages students who may be visual learners or prefer hearing instructions rather than reading them.
Interactive lessons also have the advantage of catering to different learning styles. Some students are auditory learners, while others are visual learners. By using both voice and visuals, you can provide a more inclusive learning experience. This way, you ensure that all students can access and absorb the material in a way that suits them best.
Tools You Need to Create Interactive Lessons
Creating interactive lessons with voice and visuals doesn’t have to be expensive or require complicated software. There are many affordable and even free tools available that can help you add both voice and visuals to your lessons.
For video editing and narration, tools like CapCut offer great features. With CapCut's AI video generator, you can quickly create video content that integrates images, voiceovers, and text. The platform’s intuitive design makes it easy for anyone, even beginners, to produce high-quality content.
With an AI video generator, you can customize your videos to match the needs of your lesson. Whether it’s adding a voiceover to a tutorial video or creating animated content, these tools help streamline the process. Plus, they offer a range of styles and effects to keep your lessons visually engaging.
How to Use Text to Speech in Your Videos Using CapCut
Creating interactive lessons with voiceovers using text to speech is easy and quick. You can follow these three simple steps to add voice narration to your video:
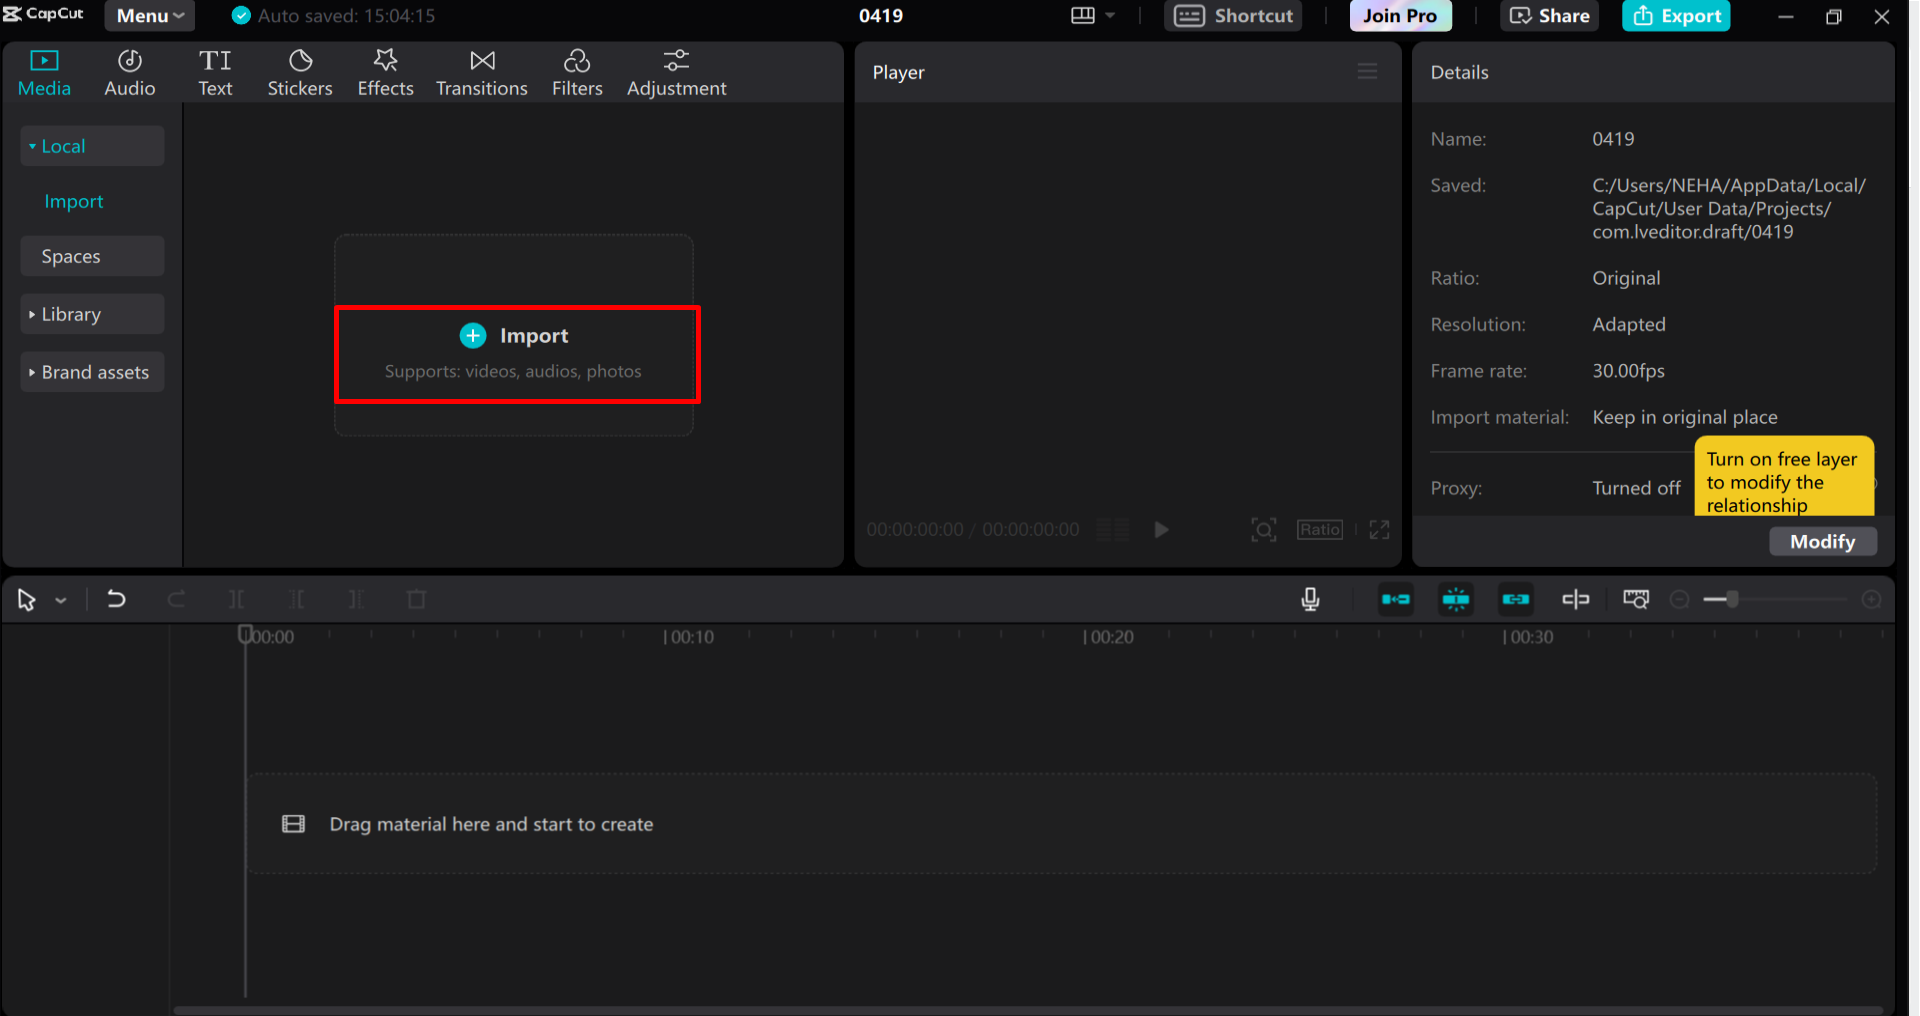
Step 1: Import Video
Start by importing the video content you want to add voiceovers to. You can upload your video directly to CapCut and start editing. You can also add images or animations if needed, to enhance the visuals.
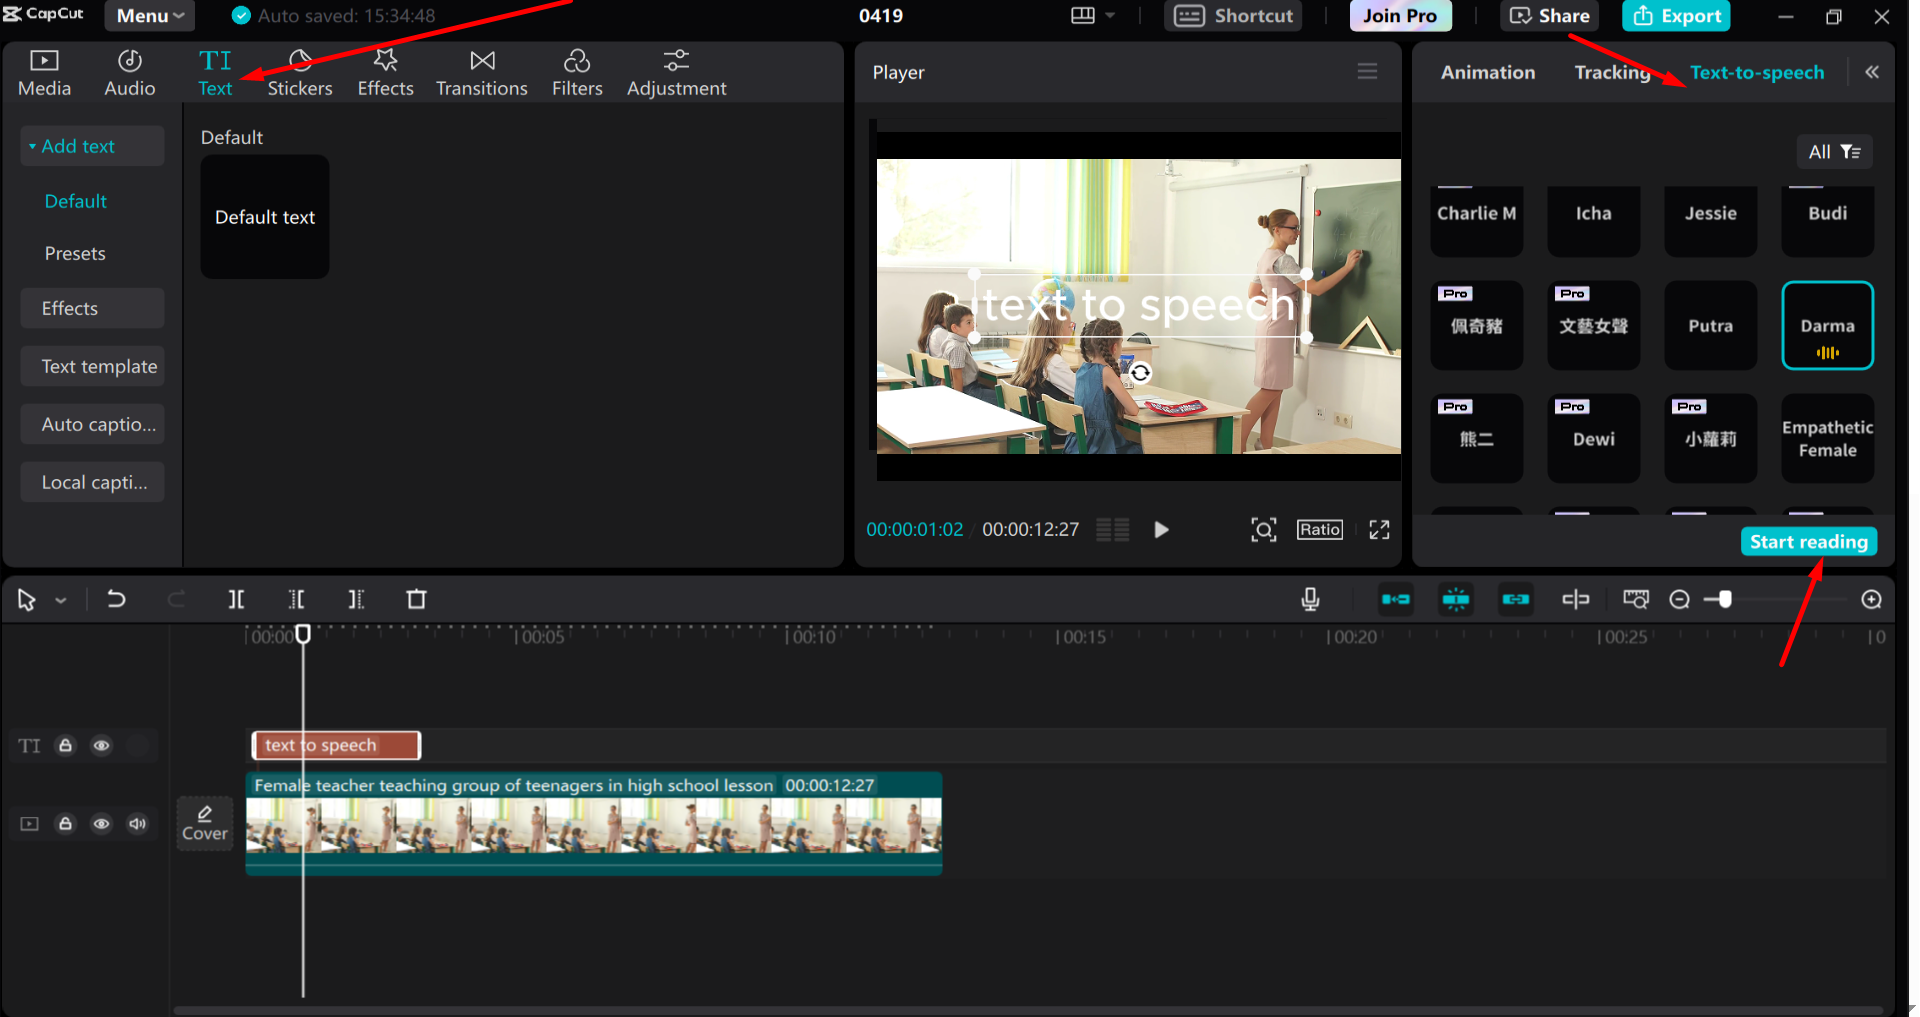
Step 2:Convert Text to Speech
Once your video is ready, use the text to speech feature in CapCut to convert any written content into spoken words. Type the text you want to be spoken, choose your preferred voice and language, and CapCut will generate the voiceover for you.
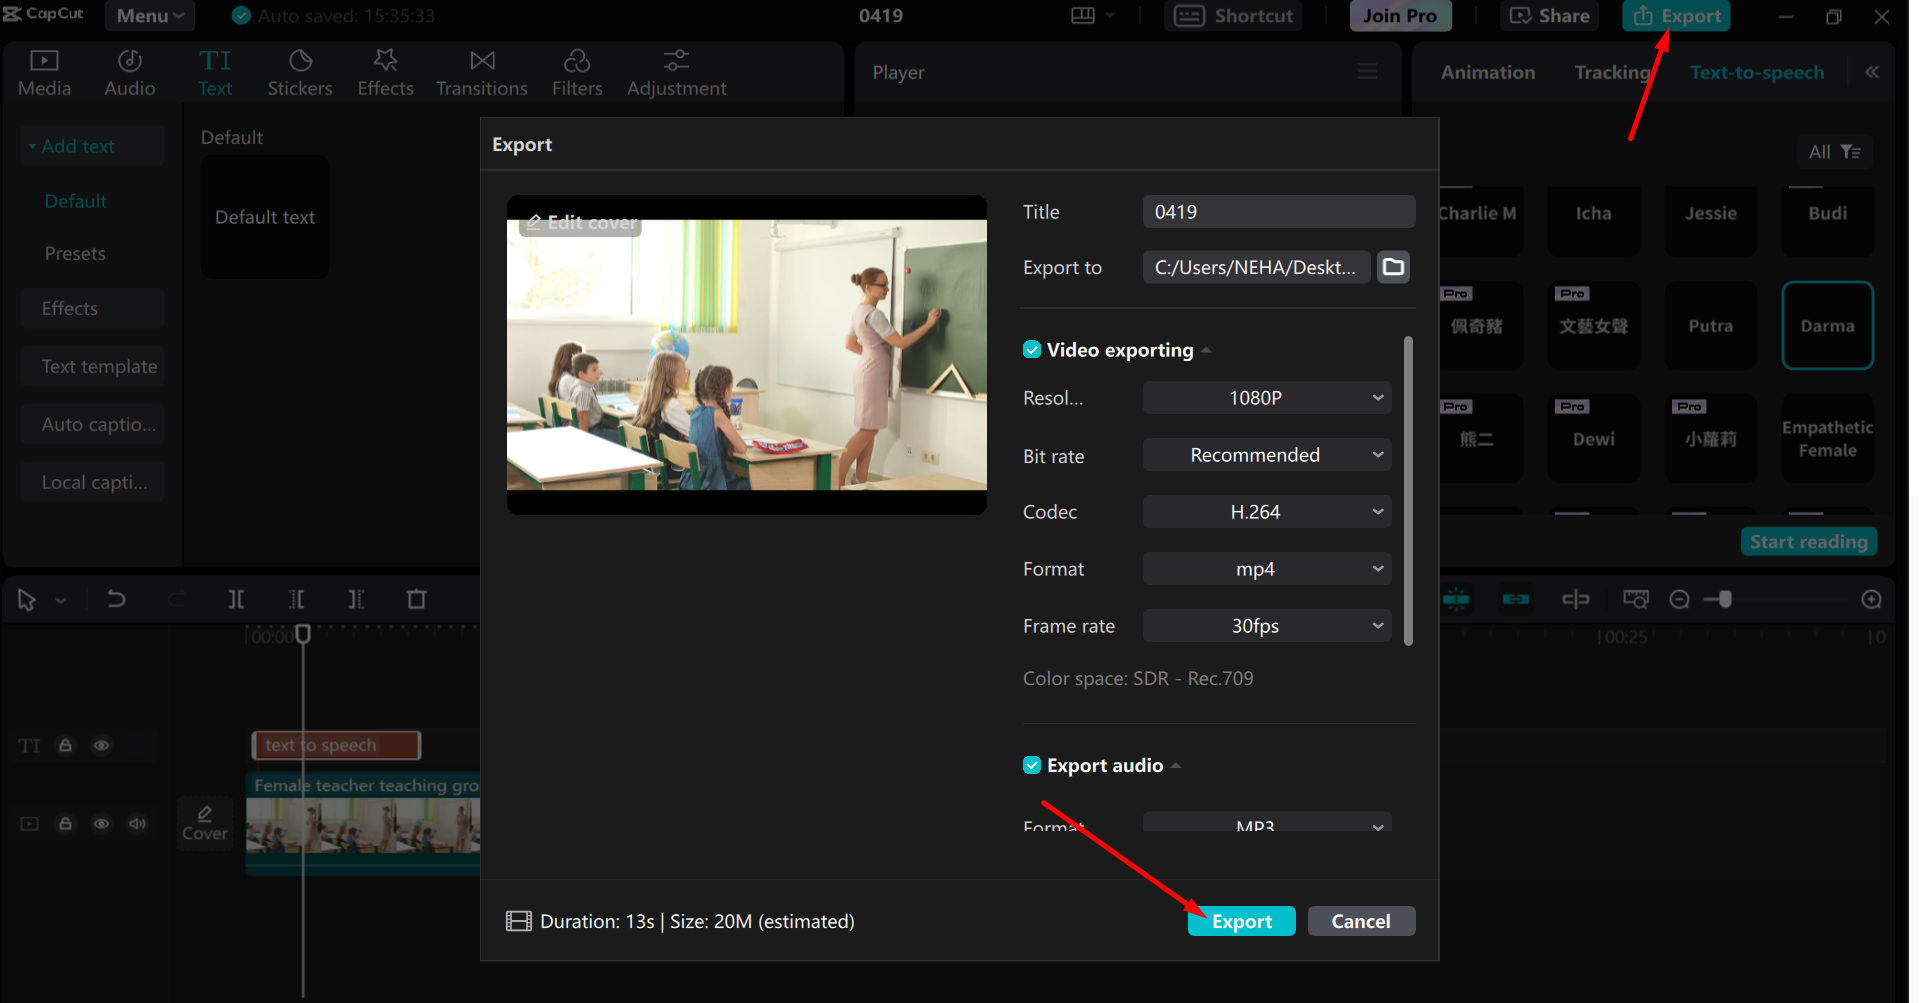
Step 3: Export Video
After adding the voiceover and making any final adjustments, export the video. Your video is now ready to be shared with your students or audience. You’ve successfully created an interactive, voice-narrated lesson with visuals—all without needing a professional studio setup.
The best part about using CapCut is that it's free and user-friendly, making it an excellent option for educators and content creators on a budget. Whether you’re making an educational video for students or a promotional video for your business, CapCut helps you create high-quality content with minimal effort.
Adding Visuals to Support Your Voiceover
Once you've added your voiceover using text to speech, it’s time to focus on the visuals. The combination of voice and visuals creates a dynamic experience that helps learners understand the material better.
Consider adding animations, infographics, or text overlays to highlight key points in your video. For example, if you’re explaining a science concept, use diagrams or animated graphics to help illustrate your points. This visual aid can greatly enhance comprehension.
Moreover, if you want to create something more immersive, consider using background music or sound effects. These audio additions can make your video feel more engaging and enjoyable, which will keep your learners’ attention focused.
Tools like AI video generator can help you create these visuals seamlessly. You can quickly generate backgrounds, animations, and even transitions to give your video a professional touch. By using these tools, you can produce a visually appealing and informative video with ease.
How to Enhance Your Lessons with a Voice Changer
If you want to take your interactive lessons to the next level, you might want to experiment with voice effects. CapCut's voice changer is a fun and useful tool that can add a unique twist to your videos. It allows you to modify the tone, pitch, and style of the voiceover to match the mood or theme of your lesson.
For instance, you could use a voice changer to make your lessons more playful or dramatic, depending on the content. If you’re teaching young students, a fun, cartoonish voice might keep them engaged. Alternatively, if you’re presenting a more serious topic, a deep, professional voice could add weight to the content.
Using a voice changer is easy. Simply upload your voiceover to the tool, choose the effect you want, and apply it to your audio. This simple enhancement can make your lessons much more entertaining and memorable for your audience.
Conclusion
Creating interactive lessons with voice and visuals is now more accessible than ever. By using tools like text to speech, AI video generator, and voice changer, you can easily enhance the quality of your content without the need for expensive studio equipment. These tools allow you to create professional and engaging lessons from the comfort of your own home.
Whether you're an educator looking to engage your students, a content creator wanting to spice up your videos, or a business owner trying to create instructional content, these tools are invaluable. With just a few simple steps, you can transform any lesson into a dynamic and interactive experience for your audience.
So, what are you waiting for? Start exploring these tools today and create your own interactive lessons. You don't need a studio to produce high-quality content—just the right tools and a bit of creativity.